BLUETTI Charger 2 Review 1200W Alternator & Solar Charging
Updated:
The BLUETTI Charger 2 is an all-new DC-DC alternator charger designed to push the boundaries of vanlife, RV, and off‑grid power systems. In this review, I break down the capabilities, new features, and important considerations to help you decide if it’s the right fit for your setup. It offers several advanced capabilities, including up to 1,200W combined output and the ability to reverse-charge your vehicle's starter battery. However, taking full advantage of these features requires compatible hardware and a clear understanding of the system’s limitations.
This review covers everything you need to know about Charger 2. I explain how it works, what is new, where it performs well and where it falls short.
Not sponsored. BLUETTI provided this unit for review, but I'm not paid or under contract. All opinions and findings are my own. Thanks for supporting small independent creators. Affiliate links may earn me a small commission at no extra cost to you (info).

More photos and setup instructions below.
Overview
- Automatic Charging: Automatically controls charging using intelligent voltage detection or an optional ignition wire so it only operates when the vehicle is running.
- Multifunctional: In addition to charging, when connected to a compatible BLUETTI power station it also offers reverse charging and battery maintenance for the vehicle's battery.
- Broad Compatibility: Basic charging and solar also work with many third‑party models from brands like EcoFlow and Jackery. This flexibility makes it a versatile option for mixed‑brand power setups.
- Smart App Control: Monitor energy flow and adjust charging settings via the BLUETTI app.
- Backwards Compatible Wiring: Designed as a true drop‑in upgrade for Charger 1 users. Existing wiring can stay in place, which makes upgrading fast, clean, and hassle‑free.
- Configurable Charging Power: When using the power station port (CHG), you can manually throttle the wattage to a desired level, making it compatible with smaller alternators or specific batteries.
What's New
- Increase in Charging Power: Delivers a significantly higher charging rate compared to the previous generation, supporting up to 800W of input from the alternator (at 12V or 24V) for a combined total charging power of up to 1,200W maximum when paired with solar and using power station port (CHG).
- Bidirectional Port: A bidirectional port (BAT) designed for connecting a BLUETTI power station with an expansion port (Apex 300, AC200L, AC200MAX) or a BLUETTI expansion battery (B300K, B500K, B230, B300). Charge at up to 1,000W maximum when paired with solar.
- Solar Input: Now features a dedicated 600W solar input (PV) with a voltage range of 13-50V. This allows you to charge your power station from solar panels while stationary or supplement the alternator while driving. This is a major improvement for power stations that only have a single PV input to share between solar and alternator charging.
- DC Hub Accessory: Expand into a complete DC power distribution center by adding the DC Hub. This provides nine extra DC output ports, including a 50A Anderson SB50 port, cigarette lighter, USB-C, USB-A, and DC5521. Requires a compatible BLUETTI device connected to the bidirectional port to be active when the vehicle is off.
- Two Power Stations: Supports charging two power stations simultaneously: one through the power station port (CHG) and the other through the bidirectional port (BAT).
- Ignition‑Triggered Auto Start: Can be configured to automatically power on via the vehicle's ignition or engine run signals using an optional D+ signal wire accessory. This is a major improvement, especially for vehicles with smart alternators, as it ensures the charger only draws power when the engine is running and continues to charge even when the voltage decreases.
Considerations
- Price: Currently one of the most expensive options on the market, but does offer several advanced features that many other models don't include.
- Power Station Compatibility: Third-party power stations and BLUETTI models without a compatible expansion port are restricted to the one-way power station port. These units can be charged but do not support reverse charging features or the ability to power the DC Hub.
- Lower Bidirectional Charge: Bidirectional port only supports 1,000W, whereas the power station port supports 1,200W.
- Jump‑Start Limitation: Charger 2 cannot be used to jump‑start a vehicle. Its reverse‑charge output is limited to 800W. While this is suitable for recharging a starter battery, it is far below the surge current required for engine starting. For instant jump-starting, consider the NOCO Boost GB40 for standard vehicles or the NOCO Boost GB70 for larger trucks.
- DC Hub Limitation: This port only provides power when the vehicle is running or when a compatible BLUETTI device is connected to the bidirectional port. It does not function with solar input alone or while the vehicle is off without a device connected to the bidirectional port.
- D+ Cable Not Included: If your vehicle uses a smart alternator (common on most models built after 2015), you’ll likely want the optional D+ signal wire. Since it’s not included in the box, plan to purchase one separately for more reliable automatic-start behavior.
- Fan noise & performance:The fan was louder than expected, especially compared to brands that offer fanless chargers. This is less of a concern in practice because vehicles are noisy while driving. Charger 2 also offers a “Silent Charging” mode, which works by significantly throttling the charging rate (On my unit, it drops from 790W to 265W).
- Large Fuse: The included fuse is large and may not fit in some recessed battery compartments. To resolve this, you can use a separate extension cable with an inline fuse block and a 75A-rated fuse.
- Limited Ingress Protection: With an IP20 rating, the Charger 2 offers no protection against water and minimal protection against dust. Keep this in mind if you plan to install it in dusty environments. Long-term dust buildup inside the unit could impact cooling performance compared to a sealed, fanless design.
- Altitude Limitation: The manual lists an operating altitude of up to 6,561 ft (2,000 m). If that limit is strict, it is a real constraint for people who camp or travel at higher elevations. BLUETTI should raise this limit in future hardware revisions or provide clearer guidance on what to expect above it.
Issues
There are a few issues to be aware of with Charger 2 and the DC Hub. These may only surface in certain setups, but they are worth noting if you require specific functionality.
I'm in direct communication with BLUETTI regarding these findings and will update this review as they are resolved. I have also started a Reddit thread so others in the community can voice if they are impacted by these issues; feel free to join the discussion there.
Detailed Comparison
BLUETTI Charger 2 vs Charger 1 comparison table:
| Model | Charger 2 | Charger 1 |
|---|---|---|
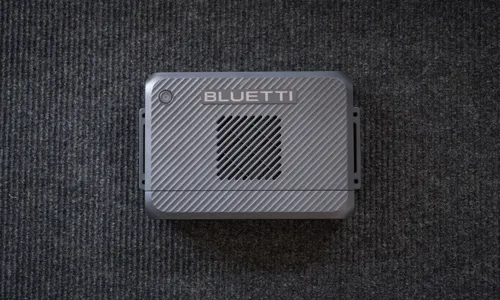
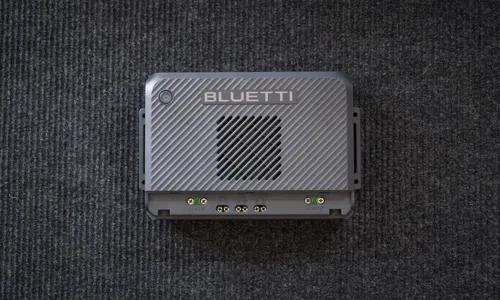
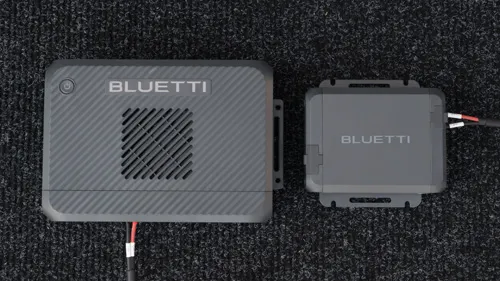
| Photo |  |  |
| Links | ||
| Price | $499 | $249 |
| Alternator Input | 800W | 560W |
| Solar Input | 13-50V⎓20A, 600W | -- |
| Power Station Port | 1,200W | 560W |
| Bidirectional Port | 1,000W 1 | -- |
| DC Hub Port | 700W 2 | -- |
| Max Reverse Charge | 800W 1 | -- |
| Battery Maintenance | 100W 1 | -- |
| Signal Wire (D+) | Add-on | -- |
| Size | 10.4 × 6.7 × 2.7 in (265 × 169 × 70 mm) | 5.7 × 4.3 × 2.4 in (145 × 110 × 60 mm) |
1. Requires compatible BLUETTI product. 2. Requires BLUETTI DC Hub. Also requires a BLUETTI device connected to the bidirectional port to be active when vehicle is off.
Charger 2 is larger and more expensive than Charger 1, but it introduces several advanced charging features that are not possible with the base model.
For more details about Charger 1 see my review:
Not everyone needs all of Charger 2’s advanced features. I would love to see BLUETTI offer a lower‑cost version that keeps the Charger 1 model's core functionality while adding built‑in D+ support and an adjustable charging rate. That would better serve users who want reliable alternator charging, especially for vehicles with a smart alternator.
Full Specifications
Check Compatibility
View my detailed compatibility guide for BLUETTI power station support and 3rd-party battery system limits. My guide outlines the exact wattage limits for every BLUETTI power station using Charger 2 alternator and/or solar charging. It also includes a compatibility calculator for 3rd-party brands like EcoFlow, Jackery, and Anker to ensure your setup is safe and efficient.
BLUETTI Charger 2 Compatibility
Compatibility Guide
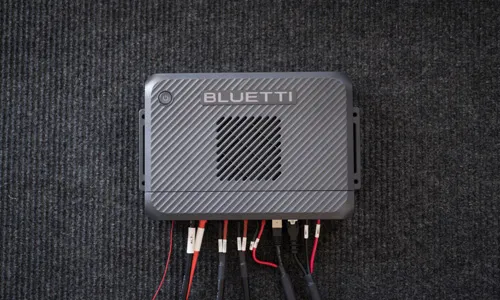
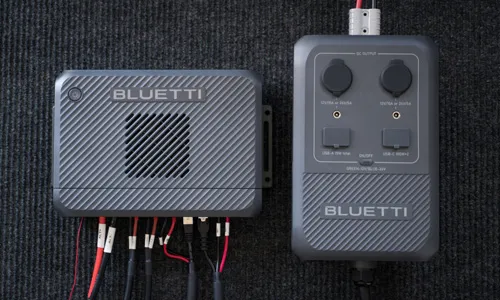
How to Install
Installing Charger 2 isn't difficult, but it does require vehicle battery access, making the DC electrical connections, thoughtful cable routing, and a few basic tools.
Enlarge photos for captions.
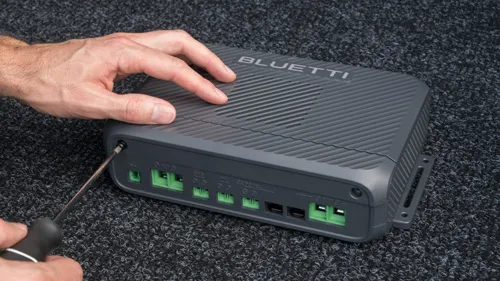
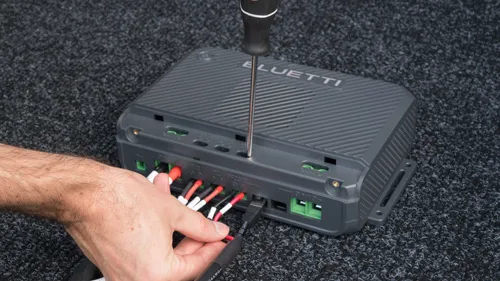

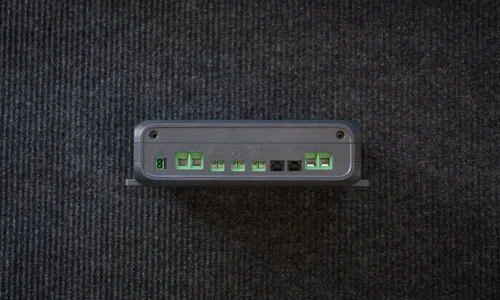
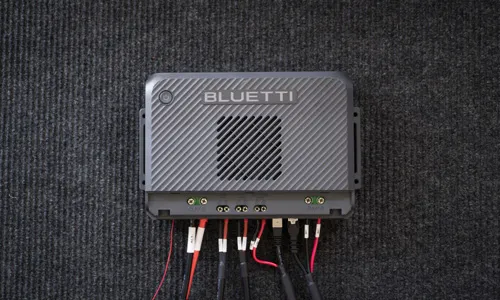
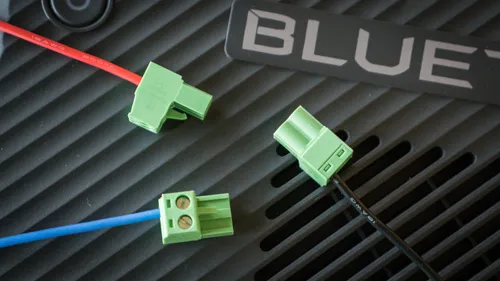
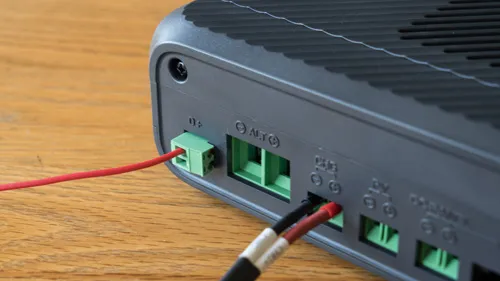
Because it uses screw terminals, it's important to check them occasionally to ensure they don't vibrate loose over time, which can be a fire hazard. I appreciate that BLUETTI doesn't use proprietary connectors, but it would be nice if they were fully vibration-resistant and included additional protections to prevent a user from wiring it incorrectly.
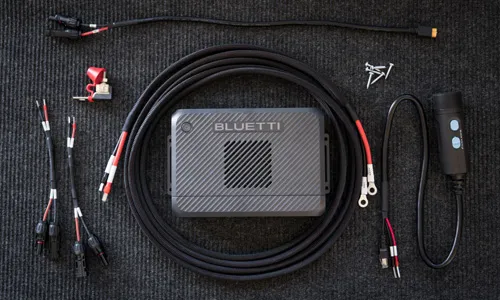
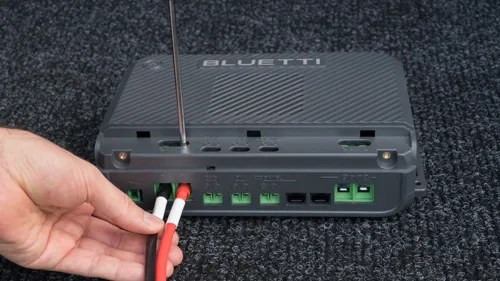
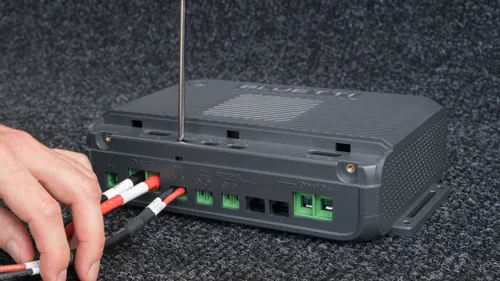
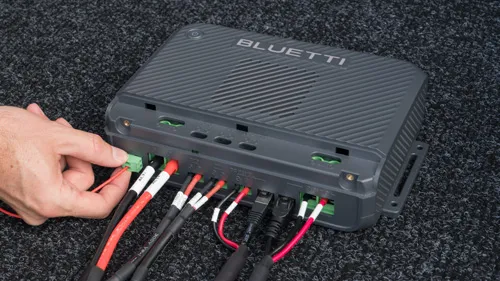
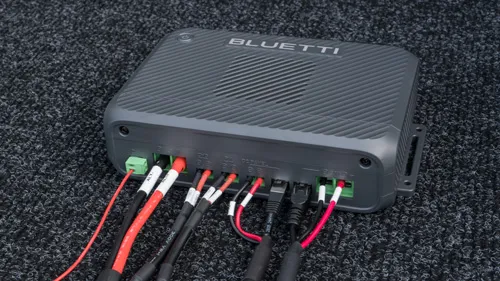
Cables
For the connection between Charger 2 and your vehicle’s battery, BLUETTI utilizes flexible, silicone-insulated 6AWG stranded wire encased in a durable braided sleeve. At over 16 feet, the battery cable is generously long, and its design allows for significantly easier routing compared to traditional cables with rigid PVC insulation. In contrast, EcoFlow uses standard PVC insulation and an overly tight braided wrap, resulting in a cumbersome cable that is much more difficult to maneuver.
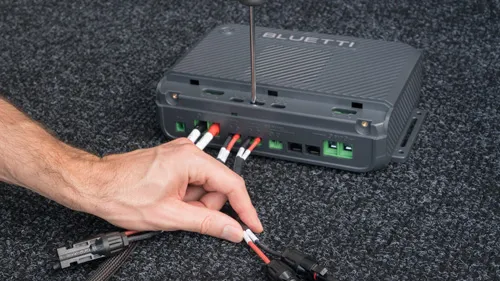
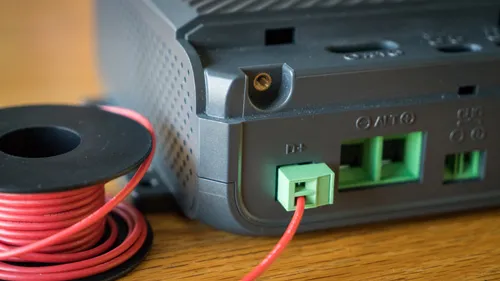
The PV and CHG cables are short and stubby, but can be easily extended with widely available solar extension cables. The BAT cable is more of a challenge since it doesn't have a built-in extension accessory. To extend it, you would need to build your own solution using what looks like 12 AWG wire and butt-splice connectors for the power lines, along with an Ethernet cable and coupler for the RJ45 data connection.
Including the P090D cable seems unnecessary since many users won’t have a use for it. Given its limited compatibility with only a few BLUETTI models, selling it as an optional accessory would be a great way to reduce the unit's base price for everyone else.
Need an install guide for a Ford Transit?

Install Guide: Ford Transit
Ford Transit + BLUETTI Alternator Chargers
App Control
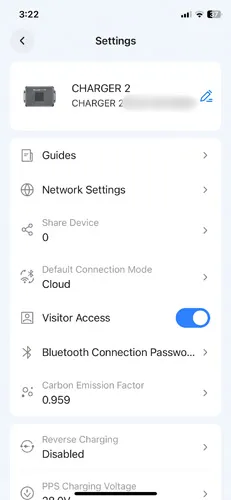
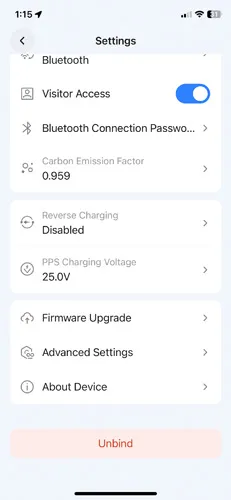
The BLUETTI Charger 2 pairs with the BLUETTI app to allow for device monitoring and customization of default settings. The app is available on iOS and Android. The following screenshots show all currently available options, ordered exactly as they appear in the settings menu.
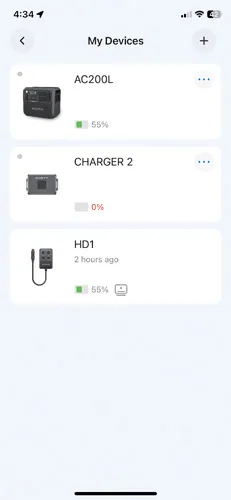
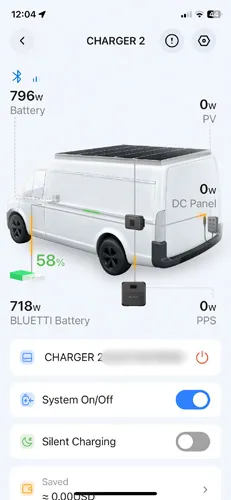
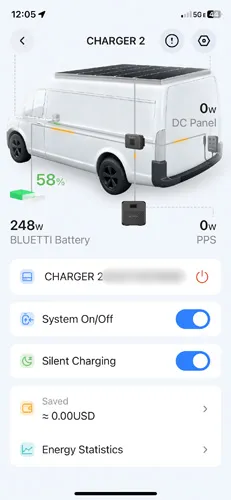

The app displays the device serial number on multiple main screens rather than a single settings page. This makes it far too easy to accidentally leak private hardware info and made capturing clean, shareable screenshots a chore.
With a few small improvements, the app could be drastically improved:
- App design: I have designed user interfaces at Microsoft, and BLUETTI’s app would benefit from clearer organization. EcoFlow provides a good example of how to make common actions easy to reach without digging through settings menus for common items.
- Naming & terminology: While the hardware is capable, the app’s naming conventions create unnecessary friction for the user. For instance, the hardware uses labels like BAT and CHG, but the app uses different terms like Parking Battery and PPS. Spelling out these acronyms and using consistent names across all platforms would make the system much more approachable. As it stands, the technical gap between the device and the app requires users to memorize a "secret code" for routine tasks, which increases the risk of accidental misconfiguration.
- In-App Guidance: While the existing tooltips are a great start for understanding complex settings, the app would benefit from more consistent coverage. Currently, several key features lack any explanation, which forces users to make assumptions about how a setting might impact their system. Adding tooltips for every toggle and including short, "how-to" video snippets in the guides section would go a long way in making the app feel like a complete resource for the user.
- Adjustable charging: In third-party mode, the app lets you adjust the charging rate, but this feature is missing for BLUETTI batteries on the CHG or BAT ports. This should be available for all connections and moved to the main screen for easy access. Even if an alternator supports 800W, users need the ability to dial it back on different trips to manage heat or efficiency without digging through settings.
- Reverse charging: This feature is currently buried too deep in the settings menu, making it inconvenient to toggle. Given that some users may want to activate this frequently to maintain a starter battery, it should be moved to the primary screen. This would make the overall user experience feel much more intuitive and responsive to daily needs.
- Vehicle Integration: The lack of CarPlay and Android Auto support is a missed opportunity for a device often used in van-life and overlanding setups where hands-free monitoring is important.
Accessories
Accessory overview, read on for more details:
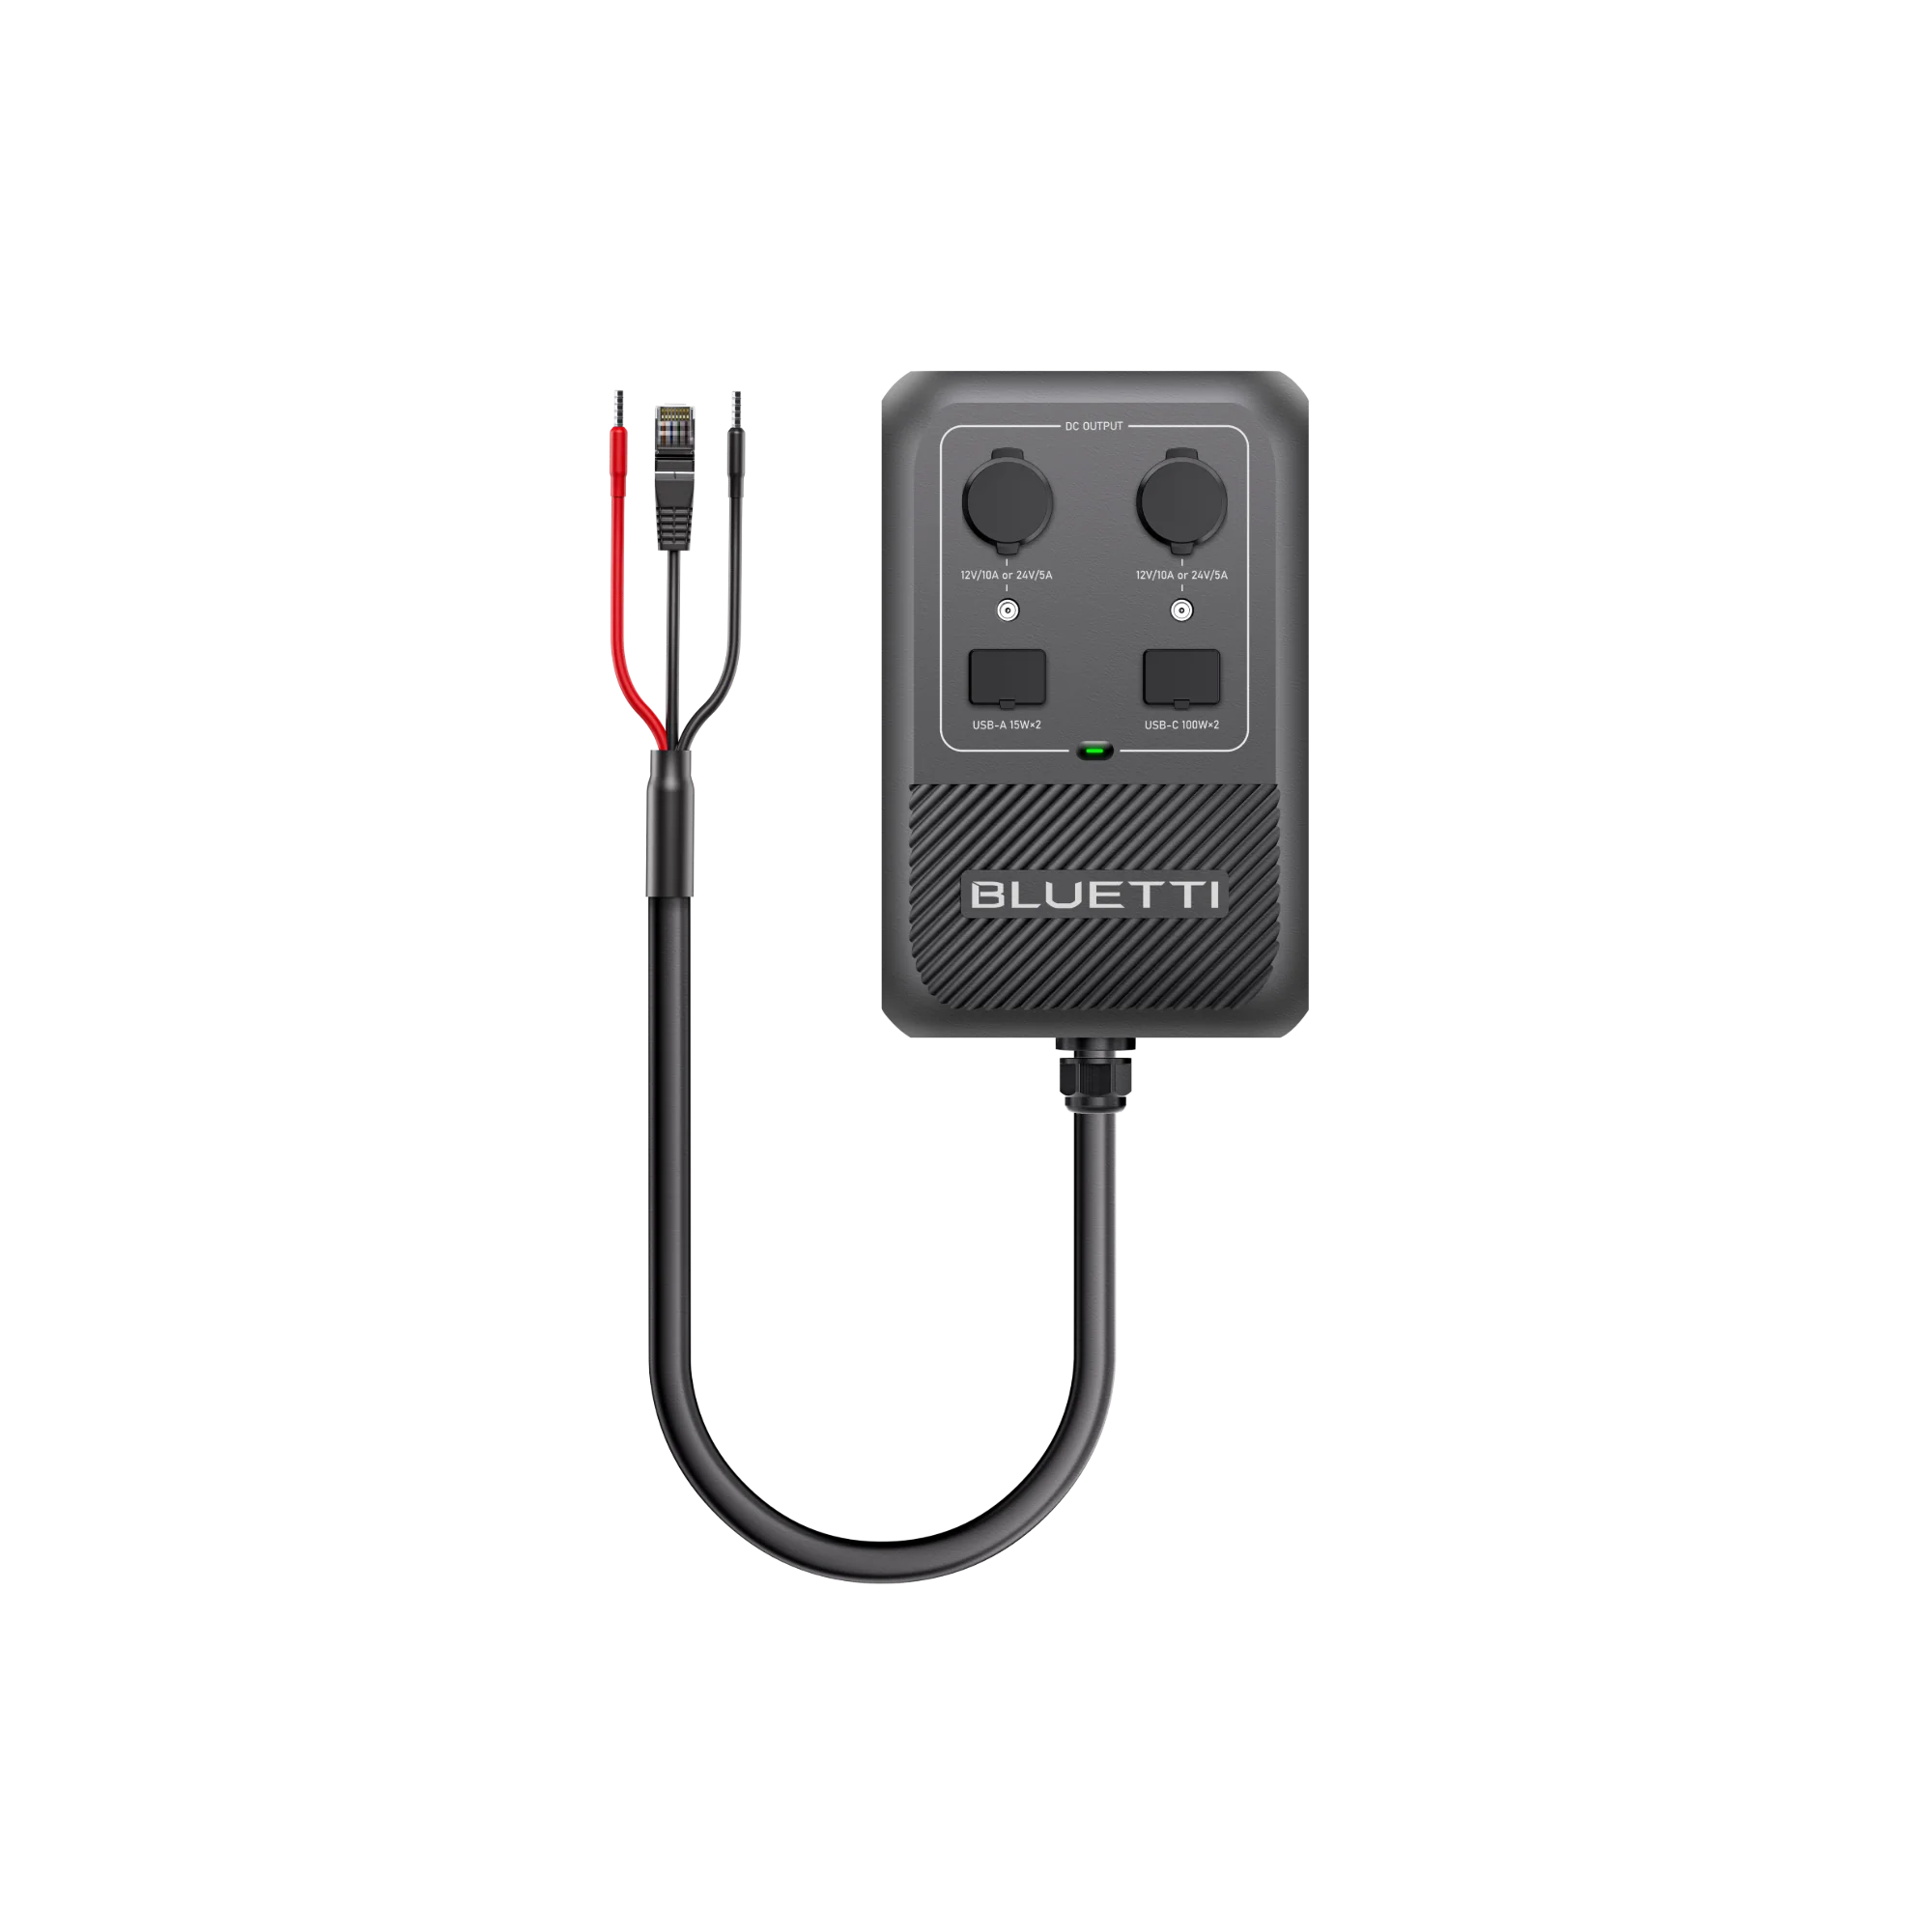 DC Hub (not Hub D1 for Apex 300)700W Total DC Power
Ports: USB-C, USB-A, DC5521, Cigarette Lighter, and Anderson Port
Price: $299 D+ Signal WireEngine run detection (smart alternators)
Price: $39

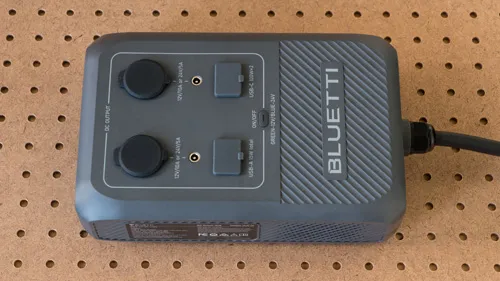
DC Hub
The DC Hub is a high-powered expansion unit providing a variety of DC ports. I applaud BLUETTI for including a 12V 50A output, as very few power station ecosystems offer this capacity, typically limiting users to 10A or 30A. Having this available is genuinely useful for higher power builds that require more substantial current.
- DC Hub (not Hub D1 for Apex 300)700W Total DC Power
Ports: USB-C, USB-A, DC5521, Cigarette Lighter, and Anderson Port
Price: $299
The hub features a large mounting clip originally designed to mount on the handle of the Apex 300. The rear clip can be removed with a screwdriver, allowing the unit to be secured directly to a wall for a cleaner installation.

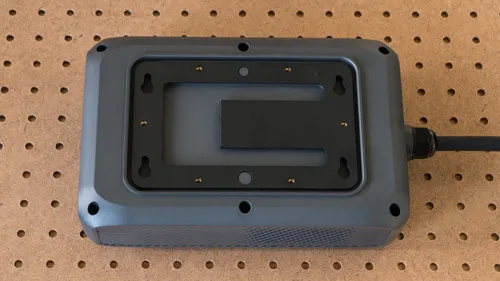
The DC Hub feels like a large and expensive workaround for what it provides. Ideally, this functionality would be integrated directly into the power stations themselves. Given its footprint and price point, the unit should have included dedicated space for a few circuits with blade fuses.
The physical design is somewhat awkward; the power cable is quite thick, and the Anderson port would have made more sense on the same end as the cable to save space. While an Anderson SB50 connector is included, BLUETTI provides no crimping instructions or technical specifications. Furthermore, the included lugs only support 10–12 AWG wire and do not accommodate the 6 AWG wire necessary for longer circuits carrying 50A loads.
Although marketed with the ability to switch between 12V (50A) and 24V (25A) output, I have been unable to toggle the 24V mode within the app. Beyond a simple toggle, the ability to set a precise voltage would be a major improvement, particularly for sensitive 12V electronics that may find the standard 13.5V output too high.
The hub is not a standalone power solution and will not function with solar input alone. It requires either a running vehicle or an active BLUETTI device connected to the bidirectional port to provide power.
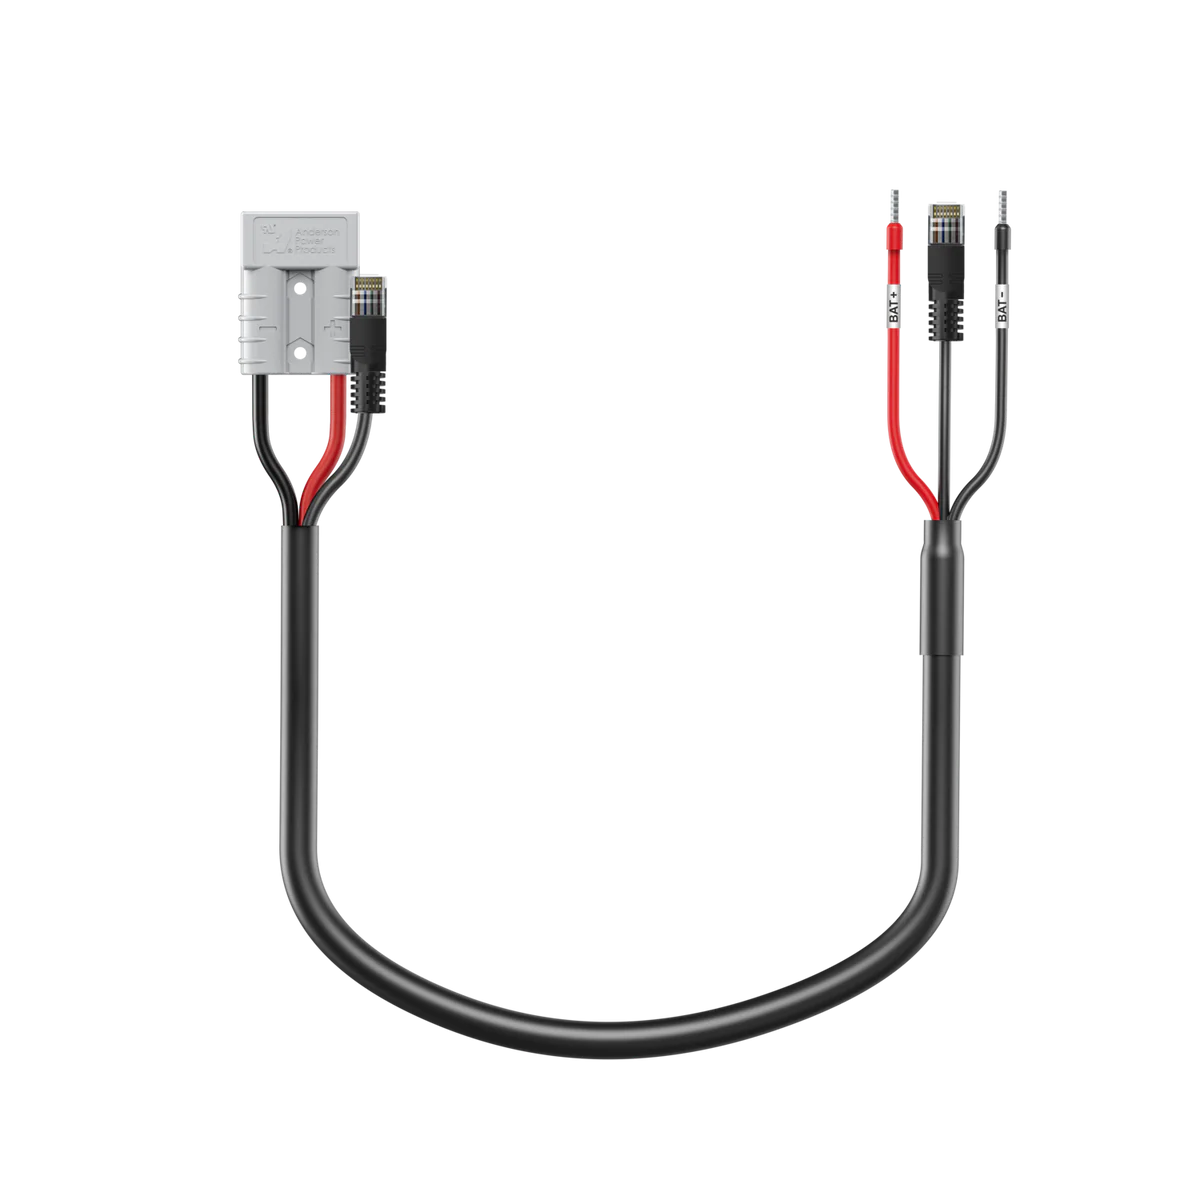
If you need to extend the DC Hub cable that connects to Charger 2, you would need to build your own solution using 14 AWG wire and butt-splice connectors for the power lines, along with an Ethernet cable and coupler for the RJ45 data connection.
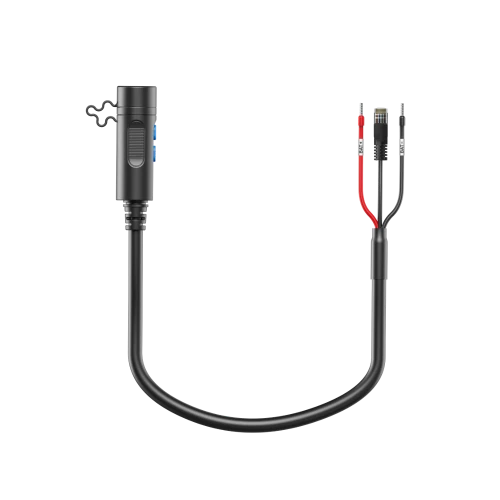
DIY D+ Cable
The official BLUETTI D+ signal wire is now available for purchase, but you can easily create your own if necessary.

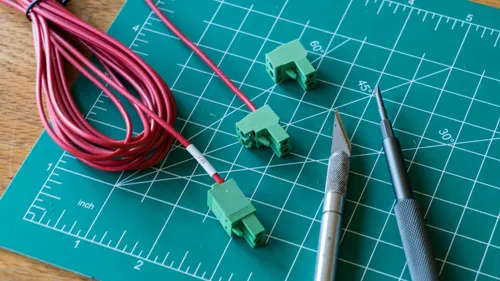
To make one, you will need the following materials:
- 5.08mm Pitch Pluggable Terminal: 2-pin with screw terminals to interface with the charger.
- 18 AWG Stranded Wire: BLUETTI uses 24 AWG, but I recommend 18 AWG for better durability in automotive environments.
How to assemble:
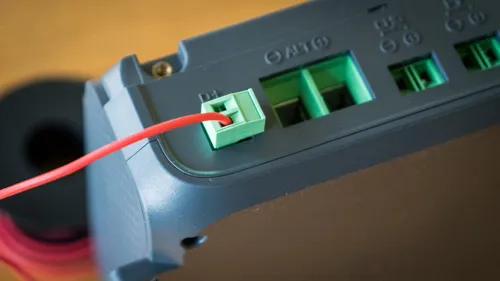
- Trim the Terminal: Trim a small notch off the side of the green terminal with a knife so it clears the case and won't rattle loose.
- Wire the Plug: Strip a small section of wire, insert it into either pin of the terminal block, and tighten the screw clamp.
Charger 2 shorts the terminal pins internally, meaning the signal cable can be connected to either of the two pins on the pluggable terminal to activate the charger. To make the Charger 2 truly "plug-and-play" for modern vehicles, BLUETTI should include this cable by default and make its status clear in the app interface.
Depending on your vehicle’s setup, you will need a fuse tap (ensure the type matches your vehicle's fuse box, e.g., ATO, Mini, or Micro2) or a ring terminal for connecting to a terminal stud (less common).
Official D+ signal wire:
Price: $39
Bidirectional Compatibility
Bidirectional power flow is supported via the following cables with a compatible power station or battery:
A cable for the B300S is mentioned in the original manual but is not yet available for purchase.
BLUETTI AC200L
Vanlife Power Station Review
My Verdict
The BLUETTI Charger 2 is a high-speed DC-DC alternator charger that delivers up to 1,200W of combined vehicle and solar input. It supports bidirectional charging to maintain both connected power stations and the vehicle's starter battery, while an integrated DC Hub port offers comprehensive DC power distribution for off-grid systems.
Some features rely on specific hardware and come with system limitations that are important to keep in mind. Overall, it’s a capable and competitive alternator‑charger option, with real‑world performance that depends on the equipment you pair it with. Be aware of a few current firmware issues with the Charger 2 and DC Hub that impact some setups.
The Bottom Line: If you are already in the BLUETTI ecosystem and want the fastest charge times, this is a strong hardware upgrade, provided you are aware of the current firmware limitations.
Not sure it’s the best fit? My alternator charger guide covers all the popular brands.
This page will be updated as new information becomes available.